
Plywood splinters because blade teeth lift the face veneer on the exit side of the cut. That’s it. Every technique in this guide is designed to prevent exactly that.
On construction plywood, tear-out is an annoyance. On quality material like hardwood plywood or Baltic birch, it’s a mistake that affects the whole project. Getting clean cuts on finish-grade material is worth doing correctly the first time.
Four factors determine whether your cut splinters or stays clean: blade choice, face orientation, scoring, and support. This guide covers all four with specific, tool-by-tool guidance.
Why Plywood Splinters
Saw teeth cut in one direction and exit the material on the opposite face, lifting fibers as they go. That lifting action is tear-out. The veneer face is thin and prone to it, especially on finish-grade panels where the surface is what the whole project depends on.
The exit side changes based on your tool. A circular saw exits through the top face. A table saw exits through the bottom face. This is why face orientation advice flips depending on which saw you’re using, and why generic “cut face up” or “cut face down” advice without naming the tool causes confusion.
Finish-grade plywood shows tear-out more severely than construction grade. Hardwood plywood has thinner face veneers that splinter more visibly. Baltic birch has multiple thin plies, meaning more veneer edges at every cut.
Choose the Right Blade First
Blade choice is the single highest-impact variable. Most tear-out problems trace back to using the wrong blade, not the wrong technique.
Tooth count is what matters most. More teeth means smaller chips and less veneer lifting on exit. For construction plywood, a 24-40 tooth blade gets the job done. For hardwood plywood, Baltic birch, or any premium panel, use 60-80 tooth minimum. Prefinished plywood benefits from 80 or more.
The grind matters too. Look for ATB (Alternate Top Bevel) on the tooth grind. ATB blades are designed specifically for cross-cutting wood fibers cleanly, which is exactly what you’re doing every time you cut across a plywood face veneer.
Blade quality affects results as much as tooth count. A low-quality 80-tooth blade still produces tear-out. Carbide-tipped teeth last longer and cut cleaner. Keep blades free of pitch buildup, which causes burning and increases tear-out even on a sharp blade.
Quick Reference: Blade by Application
| Application | Tooth Count | Notes |
| Construction/CDX plywood | 24-40 | Speed over finish quality |
| Hardwood plywood | 60-80 | ATB grind preferred |
| Baltic birch | 60-80 minimum | 80+ for visible faces |
| Prefinished plywood | 80+ | Protect existing finish |
Score the Cut Line Before You Saw
Most beginners skip scoring. Most experienced woodworkers don’t.
Scoring severs the veneer fibers along the cut line before the blade passes through. Severed fibers can’t be lifted by the blade because they’re already cut. It’s the most effective single technique for eliminating tear-out on the exit face, regardless of which tool you’re using.
Scoring with a utility knife
Clamp a straightedge firmly along your cut line. Run a sharp utility knife along it two or three times, enough to cut through the face veneer. Make your saw cut just slightly inside the scored line on the waste side. The blade exits into pre-cut veneer with nothing left to lift.
Scoring pass with the saw
Set your blade very shallow, just enough to kiss the surface, around 1/16 to 1/8 inch deep. Make a slow, deliberate pass along the cut line. Then raise the blade to full cutting depth and make the real cut. This works on both circular saws and table saws and adds maybe two minutes to your process.
Apply scoring on the exit-side face. That’s the top face on a circular saw, the bottom face on a table saw.
Circular Saw: Cut Face Down
Circular saw teeth exit through the top face. Put your finish face down. Tear-out happens on top, which is now the back of your piece.
This is counterintuitive for a lot of people who want to see the face they’re marking and cutting. The workaround is simple: mark your cut line on the back face, or mark the face side and transfer the line to the back before cutting.
Set blade depth correctly. The blade should extend only 1/4 to 3/8 inch below the material. Shallower depth reduces tear-out significantly because teeth enter and exit at a steeper angle with less surface contact. Check and reset for each material thickness.
Use a straightedge guide. Freehand cuts wander, and a wandering blade causes tear-out from lateral flex. Clamp a straightedge along your cut line, or use a manufactured cutting guide.
Move at a steady pace. Too fast causes the blade to deflect and tear rather than cut cleanly. Too slow causes heat buildup and burning. Find the pace where the motor runs smoothly without laboring and hold it through the entire cut.
Apply masking tape on the cut line. Blue painter’s tape or masking tape on the exit face supports veneer fibers right at the cut point. Apply tape, mark your line on top of it, cut through the tape, then peel it back after the cut. Most effective on veneer-faced hardwood plywood. Works best combined with a fine-tooth blade, not as a substitute for one.
Table Saw: Cut Face Up
Table saw teeth cut on the downstroke and exit through the bottom face. Finish face goes up. This is the opposite of circular saw orientation, and mixing them up is the most common face-orientation mistake people make.
Fence and featherboard setup matter. Use a quality fence set parallel to the blade. A featherboard holds the sheet firmly against the fence and prevents wandering during the cut, since sheet movement mid-cut causes inconsistent blade contact.
Use a zero clearance insert. The standard throat plate on most table saws has a wide gap around the blade that allows veneer to flex and lift right where the blade exits. A zero clearance insert closes that gap, supporting the veneer all the way to the cut point. It’s one of the highest-impact modifications you can make for clean plywood cuts, and you can make one yourself from a scrap piece of MDF sized to fit your saw’s throat.
Don’t pause mid-cut. Stopping creates burn marks and increases kickback risk. Support the sheet fully on both sides. That matters enough to cover on its own.
Track Saw: The Cleanest Option
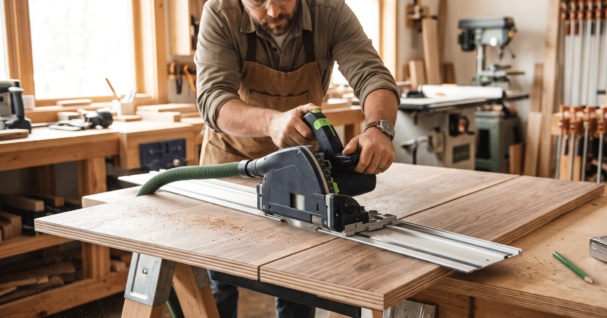
If you cut finish-grade plywood regularly, a track saw is worth knowing about. The track eliminates blade wander entirely, and the splinter guard on the track shoe supports veneer fibers right at the cut point. Face orientation matches a circular saw: finish face down.
A track saw isn’t essential for most projects. But if you’re cutting finish-grade panels regularly, the precision it delivers pays for itself in saved material.
Support the Sheet Properly
Regardless of which saw you use, sheet support is one of the most underestimated variables in getting a clean cut.
Support the sheet on both sides of the cut for its full length, not just near the saw. The offcut piece needs support too. When an unsupported offcut drops as the cut finishes, it binds the blade and causes tear-out right at the end of the cut, which is exactly where it’s most visible.
Sawhorses with a full sheet of rigid foam insulation on top is a common shop solution. The blade cuts through the panel and slightly into the foam, which also acts as a sacrificial backer supporting the exit face. Roller stands or an outfeed table work well for table saw cuts.
Species and Panel-Specific Tips
Hardwood plywood has thin face veneers that are more prone to splintering than construction grade. The thinner the face veneer, the less margin for error. On hardwood plywood specifically, a score pass before the full cut makes a noticeable difference. See our full range of hardwood plywood options.
Baltic birch generally cuts more cleanly than hardwood plywood because the void-free core gives the blade steady resistance throughout the cut. No hidden voids means no unexpected blade movement mid-cut. Still use a high tooth count blade and correct face orientation. Explore Baltic birch panels for furniture and cabinet work.
Prefinished plywood adds a layer of vulnerability the other panels don’t have: the existing finish can chip independently of the veneer. Use an 80+ tooth blade, apply masking tape on the finish face, and score the finish before cutting, not just the veneer underneath. For more on working with prefinished panels, see our prefinished vs unfinished plywood guide.
The Bottom Line
Clean cuts on finish-grade plywood aren’t about having the best tools. They’re about understanding that tear-out happens on the exit face and systematically eliminating every reason for veneer to lift at that point.
Right blade. Correct face orientation for your tool. Score the line. Support the sheet. Do all four and your cuts will look like they came off a factory panel saw.
Starting with quality material makes that easier too. Forest Plywood stocks hardwood plywood, Baltic birch, and a full range of finish-grade panels for builders and woodworkers throughout Southern California. If you need help selecting the right panel for your project, our team can help before the order ships.
Call us at 800.936.7378 or visit our La Mirada or National City locations.
Frequently Asked Questions
Should I cut plywood face up or face down?
It depends on the saw. Circular saw: finish face down, since teeth exit through the top. Table saw: finish face up, since teeth exit through the bottom. Getting this backwards is the most common cause of tear-out on an otherwise well-set-up cut.
Does masking tape really prevent splintering?
It helps, but it works best as part of a complete approach. Tape supports veneer fibers at the cut point and reduces tear-out noticeably on veneer-faced panels. On its own without a fine-tooth blade and correct face orientation, it won’t fully solve the problem. Think of it as the last line of defense, not the whole strategy.
What is the best blade for cutting plywood without splintering?
For finish-grade panels, a 60-80 tooth ATB (Alternate Top Bevel) carbide-tipped blade. For prefinished plywood, 80+ tooth. The ATB grind and carbide tips matter as much as the tooth count since a low-quality blade with the right tooth count still tears out.
Why does my plywood splinter even with a new blade?
Usually one of three things: face orientation is backwards for your tool, the sheet isn’t fully supported so it’s flexing during the cut, or you skipped scoring on a fine veneer. A new blade rules out dullness as the cause, but the other variables still apply. Check orientation first since it’s the most common culprit.
Can I use a jigsaw to cut plywood without splintering?
For curves, cutouts, and irregular shapes, yes, with a fine-tooth downstroke blade designed for clean cuts. For long straight cuts on full sheets, a jigsaw isn’t the right tool. Blade wander over a long cut is difficult to control, and the cut quality won’t match a circular saw or table saw with proper technique.


