Winter destroys unprepared decks. Water gets into wood, freezes, expands, and cracks your boards. Snow traps moisture that causes rot. Ice damages railings.
But here’s the good news: a weekend of work now saves you thousands in spring repairs.
The best time to winterize is late September through early October. That’s about 6-8 weeks before your first frost. This gives sealant time to dry properly before cold weather hits.
This guide walks you through every step: when to start, how to clean and seal, and how to protect your deck all winter long.
Quick Weekend Timeline
Saturday morning: Deep clean (2-3 hours)
Saturday afternoon: Fix damage, sand rough spots (2-4 hours)
Sunday morning: First coat of sealant (1-2 hours)
Next weekend: Second coat after everything dries
Grab these supplies before you start: Deck cleaner, stiff brush, replacement boards for bad spots, wood filler, deck sealant, plastic snow shovel
When Should You Winterize?
Best window: Late September through early October. Southern California folks can push into November, but earlier is safer.
Here’s what really matters: temperature. Most sealants need temps above 50°F. You also need two days of dry weather so everything cures right.
Missed the window? You have two choices. Seal anyway on the next warm, dry stretch (November can still work). Or focus on damage control now and seal early spring.
Your deck needs help NOW if you see:
- Water soaks right in instead of beading up
- Boards turning gray
- Splinters everywhere
- Cracks between boards
- Railings feel wobbly
Step 1: Deep Clean Everything
Move everything off your deck. Furniture, plants, grills, decorations. Check under stuff that hasn’t moved all summer. You’ll often find hidden rot or mold underneath.
Sweep up all the leaves and dirt. Use a putty knife to scrape out junk stuck between boards. That trapped stuff holds moisture and speeds up rot.
Spray on deck cleaner following the bottle directions. Most need to sit for 10-15 minutes. Scrub with a stiff brush or use a pressure washer on low. High pressure tears up the wood. Rinse everything thoroughly.
Got mold or dark stains? Mix oxygen bleach with water. (Don’t use regular bleach—it wrecks wood.) Let it sit, scrub, and rinse. Pay attention to shady spots, under railings, and corners where moisture hangs out.
Critical part: Wait 48 hours before sealing. The wood needs to be completely dry. If you just pressure washed or it rained, wait the full two days even if it looks dry.
Step 2: Fix What’s Broken
Walk your whole deck. Grab railings and shake them hard. They shouldn’t move at all. Press on every board looking for cracks, warping, or soft spots.
Replace bad boards completely. Don’t try patching major damage. Winter makes it worse fast. Pull out the whole damaged section and put in new boards. Use stainless steel screws so they don’t rust.
Need replacement lumber? Pick materials made for outdoor use. For spots that stay really wet, grab marine-grade lumber built for tough conditions.
Tighten any loose screws you find. Look where your deck connects to the house and where posts meet beams. These spots fail first when snow piles up.
Small cracks: Fill them with outdoor wood filler. Let it dry, then sand it smooth. Big cracks mean you need a new board. Filler won’t last.
Step 3: Sand If You Need To
Skip this if your deck feels smooth and the old finish looks okay.
Sand when:
- Surface feels rough and splintery
- Old finish is peeling off
- New boards need to blend in
- You’re putting solid stain over clear coat
Use 80-grit sandpaper for rough work. Then 120-grit to smooth things out. Always sand with the wood grain, never across it. Hit the high-traffic spots and railings where people touch most.
Sweep up all the dust. Vacuum if you’ve got one handy.
Step 4: Seal Your Deck (Most Important)
Good sealant stops water from getting in. Water is what freezes, expands, and cracks everything.
Pick Your Sealant
Clear sealer keeps the natural wood look. You’ll need to redo it every 1-2 years.
Tinted stain adds some color while protecting better. Lasts 2-3 years.
Solid stain gives maximum protection and hides ugly spots. Lasts 3-5 years but covers the wood grain completely.
Look for UV protection (stops graying) and mold resistance. Oil-based goes deeper into wood and handles cold better. Water-based dries faster and cleans up easier.
How to Apply It
You need 48 hours of dry weather with temps above 50°F. Work when it’s cloudy or in the shade. Direct sun dries things too fast.
Put on thin, even coats. Use a pump sprayer for big areas, foam brush for railings. Follow the wood grain. Don’t let it puddle up—thick spots peel off later.
Do two coats for winter. Wait 24-48 hours between coats (check your product label). Pay extra attention to board ends and edges. These spots suck up more water.
Need more sealing tips? Check our guide on how to seal marine plywood.
Before you use it: Wait 48 hours before walking on it. Wait 72 hours before putting furniture back. Full cure takes 7-10 days.
Step 5: Winter Protection
Dealing with Snow
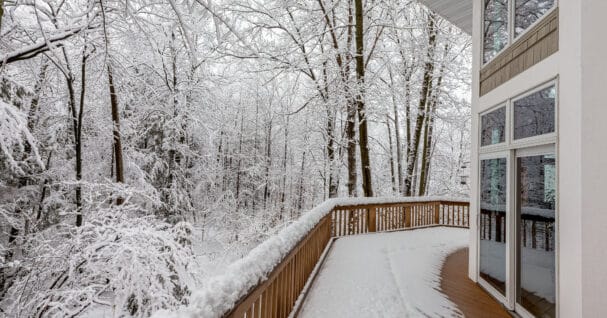
Use a plastic shovel. Metal scrapes off your finish and gouges the wood. Push snow off instead of scraping hard. Do it often so snow doesn’t pack down and get heavy.
Handling Ice
Never use rock salt on wood decks. Salt destroys both wood and sealant. Use sand for traction instead.
Don’t chip ice with metal tools. Let it melt on its own or use warm water.
Monthly Checks
Look at your deck once a month all winter. Clear off any ice buildup. Sweep away leaves and branches. Watch for water pooling anywhere.
Bring furniture inside if you can. Leaving it outside? Use covers that breathe (plastic traps moisture). Put something under the legs so they’re not sitting right on the deck.
Common Winter Problems
Freeze-thaw damage happens when water gets in, freezes, and expands. You’ll see horizontal cracks, splinters, and boards cupping upward. Good sealing stops this before it starts.
Rot from moisture shows up as soft spots when you press on wood. You might see discoloration or smell something musty. Problem areas: corners, against the house, under furniture.
Ice damage to railings loosens all the connections. After big ice storms, shake your railings to see if anything’s loose. Tighten hardware on any day above 40°F.
Chemical damage from de-icer creates white residue and makes wood look chewed up. If any touches your deck, rinse it off right away. Plan to clean deep and reseal come spring.
Didn’t Winterize Yet? Here’s What to Do
Right now: Clear off snow and ice. Look for damage. Cover really bad spots with a tarp if you can.
On warm days: When it hits 40°F, you can make small fixes. Tighten loose stuff. Clear drains so water flows away. Order materials now for spring repairs.
Wait until spring for: Replacing boards, sealing (needs warmer weather), big structural fixes, staining.
Different Areas, Different Needs
Southern California and Southwest: You still need to winterize even with mild weather. Rain moisture and occasional frost damage unprotected wood. Mountain areas in these regions get freeze-thaw cycles just like everywhere else.
Snow country: Start in September, not October. Heavy snow is your big problem. Use two full coats of sealant minimum. Really deep snow areas might need extra structural support.
Near the ocean: Salt in the air eats away at wood all year. You need to seal every year, not every 2-3 years. Think about using marine-grade stuff for repairs.
Picking the Right Sealant
Look for: UV protection (stops graying), mold resistance, how waterproof it really is, what temps you can apply it in.
Oil-based: Goes deeper, lasts longer, works in cooler weather. Takes longer to dry and smells stronger.
Water-based: Dries faster, easier cleanup, better for the environment. Needs warmer temps to work right.
How much to buy: Measure your deck (length times width). Most products cover 150-400 square feet per gallon. You’re doing two coats. Grab 10-15% extra for railings and mess-ups.
Protect What You’ve Built
A weekend of winterizing beats paying for major repairs come spring. Clean well, fix damage before you seal over it, put on two good coats, and keep snow managed all winter.
Even mild climates need this. Winter rain and frost damage wood that’s not protected.
Need deck repairs? Forest Plywood stocks materials built for outdoor use. We can help you pick the right stuff for your weather and what you’re fixing.
We’ve been supplying Southern California builders for 50+ years. We know wood care from ocean salt air to mountain snow.
Call us at 800.936.7378 or stop by La Mirada or National City.
Common Questions
When should I winterize my deck?
Late September through early October works best. That’s 6-8 weeks before first frost. Gives sealant time to cure before it gets cold.
Can I seal if it’s below 50 degrees?
Most sealants need 50°F or warmer. Some quick-dry ones work cooler—read the label. You really need two dry days more than anything.
What’s the best sealant for winter?
Oil-based goes deeper for better winter protection. Look for UV protection and mold resistance. Two coats of any good sealant beats one coat of expensive stuff.
How do I protect from snow?
Plastic shovel only (metal wrecks everything). Shovel often before it packs down. Skip the salt—use sand for traction. Keep drains clear.
What happens if I skip winterizing?
Water gets in, freezes, expands, cracks boards. You’ll deal with splinters, rot, loose railings, and expensive spring repairs.
How often do I need to reseal?
Every 1-3 years depending on weather and use. Test it: sprinkle water on your deck. If it beads up, you’re good. If it soaks right in, time to reseal.


