Plywood is a popular choice for DIY furniture, shelving, and even outdoor projects — it’s affordable, strong, and easy to work with. But to make sure your project lasts and looks great, it’s essential to properly stain and seal the plywood.
This step-by-step guide covers everything you need to know, from prepping the surface and applying stain to sealing plywood edges and protecting it for outdoor use.
Why Staining and Sealing Plywood Matters
Staining plywood improves its appearance, enhances the wood grain, and allows you to match your project to your design style. But stain alone won’t protect the wood — sealing is what prevents moisture damage, warping, and wear over time.
Whether you’re building a bookshelf, refinishing cabinets, or making outdoor furniture, sealing plywood is key to durability and longevity.
Materials & Tools You’ll Need
Before you begin, gather the right tools and supplies:
- Sandpaper (start with 80-grit, finish with 180–220 grit)
- Tack cloth or clean rags
- Wood conditioner (optional, helps avoid blotchiness)
- Wood stain (oil-based or water-based)
- Sealant (polyurethane for indoor use, spar urethane or epoxy for outdoor)
- Foam brushes, paintbrushes, or lint-free cloths
- Wood filler (for sealing edges or smoothing gaps)
Step-by-Step: How to Stain Plywood
1. Sand the Plywood
Start by sanding the plywood surface to smooth out any rough areas or manufacturer marks. Begin with coarse grit (80–100) and work your way to finer grit (180–220). Always sand in the direction of the grain. Wipe away dust with a tack cloth.
2. Apply Wood Conditioner (Optional but Helpful)
Plywood can absorb stain unevenly, especially softer varieties like pine or birch. A pre-stain wood conditioner helps the stain soak in more uniformly. Apply it evenly and let it sit for 15 minutes before staining.
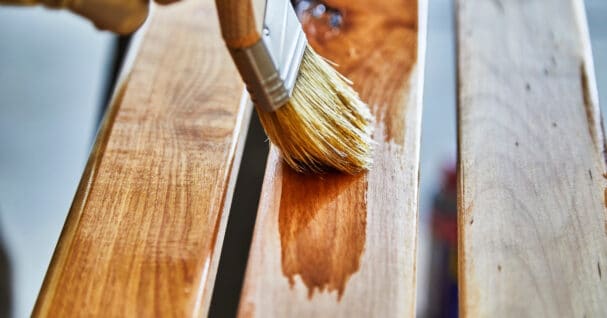
3. Apply the Stain
Using a brush, foam applicator, or clean cloth, apply the stain with the grain. Let it sit for 5–15 minutes (follow product instructions), then wipe off any excess with a clean cloth. For a darker finish, apply a second coat after the first one dries.
Let the stained plywood dry completely — usually 24 hours — before moving on to sealing.
How to Seal Plywood for Indoor Projects
For indoor furniture or shelving, a water-based or oil-based polyurethane is ideal. Here’s how to apply it:
- Use a foam brush or synthetic bristle brush to apply a thin coat of polyurethane.
- Allow it to dry according to product instructions (typically 4–6 hours).
- Lightly sand with 220-grit sandpaper between coats.
- Apply 2–3 coats for best results.
This will protect the plywood from scratches, spills, and general wear.
How to Waterproof Plywood for Outdoor Use
If your plywood project will be exposed to the elements, choose an outdoor-rated sealant like spar urethane or epoxy resin. These sealants are designed to withstand moisture, UV rays, and temperature changes.
- Apply multiple coats of the sealant to all surfaces — front, back, and sides.
- Pay special attention to edges and joints, where water is most likely to seep in.
- Let each coat dry completely before applying the next.
Reapply your outdoor sealant yearly to maintain protection.
How to Seal Plywood Edges (A Commonly Missed Step)
Plywood edges are especially vulnerable to water damage and splintering. Here’s how to seal them properly:
- Option 1: Wood Filler – Use wood filler to smooth and seal raw edges before staining. Let it dry, sand it flush, then stain and seal like the rest of the surface.
- Option 2: Thinned Epoxy or Waterproof Wood Glue – Brush along the edge to create a moisture barrier.
- Option 3: Edge Banding – Apply veneer edge banding for a clean, sealed look on furniture-grade pieces.
No matter which method you choose, make sure to seal the edges with your topcoat or waterproofing sealant after staining.
Tips for a Professional-Looking Finish
- Always test stain and sealant on a scrap piece of plywood first.
- Apply thin coats — thick ones tend to bubble or peel.
- Sand lightly between sealant coats for a smooth finish.
- Let the plywood dry completely between each step.
- Store plywood flat and dry before starting your project to prevent warping.
Need High-Quality Plywood for Your Next Project?
Forest Plywood supplies a wide range of project-ready plywood, including:
- Hardwood Plywood – Perfect for furniture, shelving, and cabinetry.
- Marine Plywood – Ideal for outdoor or moisture-prone projects.
Whether you’re staining indoor cabinets or waterproofing an outdoor bench, we can help you choose the right plywood for your DIY goals.
Visit Forest Plywood or Contact Our Team
With locations in La Mirada and National City, Forest Plywood makes it easy for Southern California DIYers and contractors to find quality wood products.
Need help selecting materials? Contact us today— our team is here to help you get the best results on your next project.
Frequently Asked Questions
Can you stain plywood without sanding?
Technically yes, but it’s not recommended. Plywood often has a smooth, sealed surface that resists stain absorption. Light sanding opens the pores and ensures even color. Skipping this step often leads to blotchy or streaky results.
Is wood conditioner necessary for plywood?
For softwood or lower-grade plywood (like birch or pine), yes — it helps prevent uneven stain absorption. Higher-grade hardwood plywood may not need it, but it’s still a safe step for a consistent finish.
What’s the difference between marine plywood and regular plywood when sealing?
Marine plywood is built for moisture resistance with waterproof glue and void-free layers. It’s ideal for outdoor use but still benefits from sealing to protect against weathering and UV exposure.
Can I apply stain and sealer on the same day?
Sometimes — but always check the product label. Most stains need 4–24 hours to dry before sealing. Rushing can trap moisture and lead to a cloudy or uneven finish.


